Sewing Machine Parts and Their Functions: A Simple Guide with Pictures
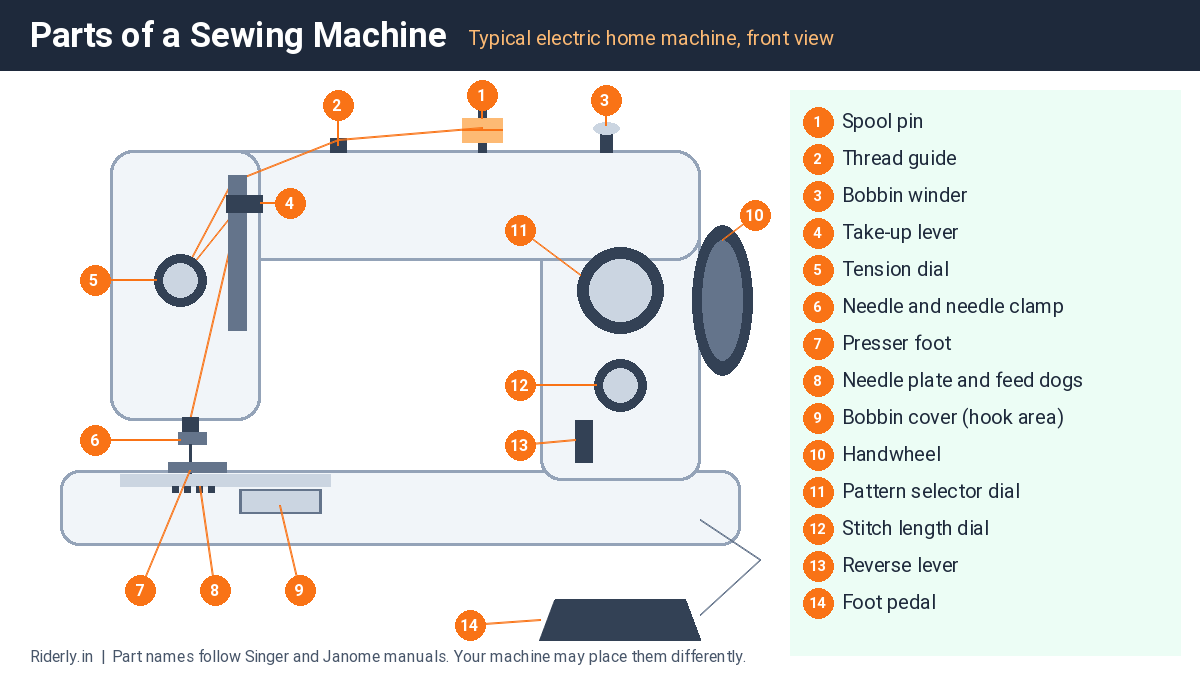
Quick Answer: What Are the Main Parts of a Sewing Machine?
- Threading parts guide the top thread and set its tension
- Stitch-forming parts make each stitch and move the fabric
- Bobbin system holds and feeds the lower thread
- Control parts set the stitch type, length and direction
- Power parts drive the machine: motor and pedal, or hand wheel and treadle
How a Sewing Machine Makes One Stitch
- 1. Needle goes down: the needle carries the top thread through the fabric and the hole in the needle plate.
- 2. Hook catches the loop: as the needle starts to rise, the top thread forms a small loop. The hook under the needle plate catches it and carries it around the bobbin case.
- 3. Threads lock: the loop wraps around the bobbin thread, so the two threads interlock.
- 4. Take-up lever pulls it tight: the take-up lever rises and pulls the extra top thread back up, setting the stitch.
- 5. Feed dogs move the fabric: the teeth under the presser foot push the fabric forward by the stitch length you set, and the cycle repeats.
1. Threading Parts (the Top Thread Path)
- Spool pin: the vertical or horizontal pin that holds the thread spool. A spool holder or cap keeps the spool from bouncing.
- Thread guides: small hooks and slots that keep the thread on its path from the spool to the needle.
- Thread tension dial: squeezes the top thread between two tension discs. A higher number means tighter top thread. It controls whether the two threads lock in the middle of the fabric.
- Check spring: a small wire spring next to the tension discs that takes up slack while the stitch forms (named on many Janome machines).
- Thread take-up lever: the lever that moves up and down at the front of the machine. It pulls the top thread up after each stitch. If you miss it while threading, you get thread nests under the fabric.
- Thread cutter: a small blade on the side of the head for cutting both threads after sewing.
- Automatic needle threader: a hook on many newer machines that pulls the thread through the needle eye for you.

2. Needle and Stitch-Forming Parts
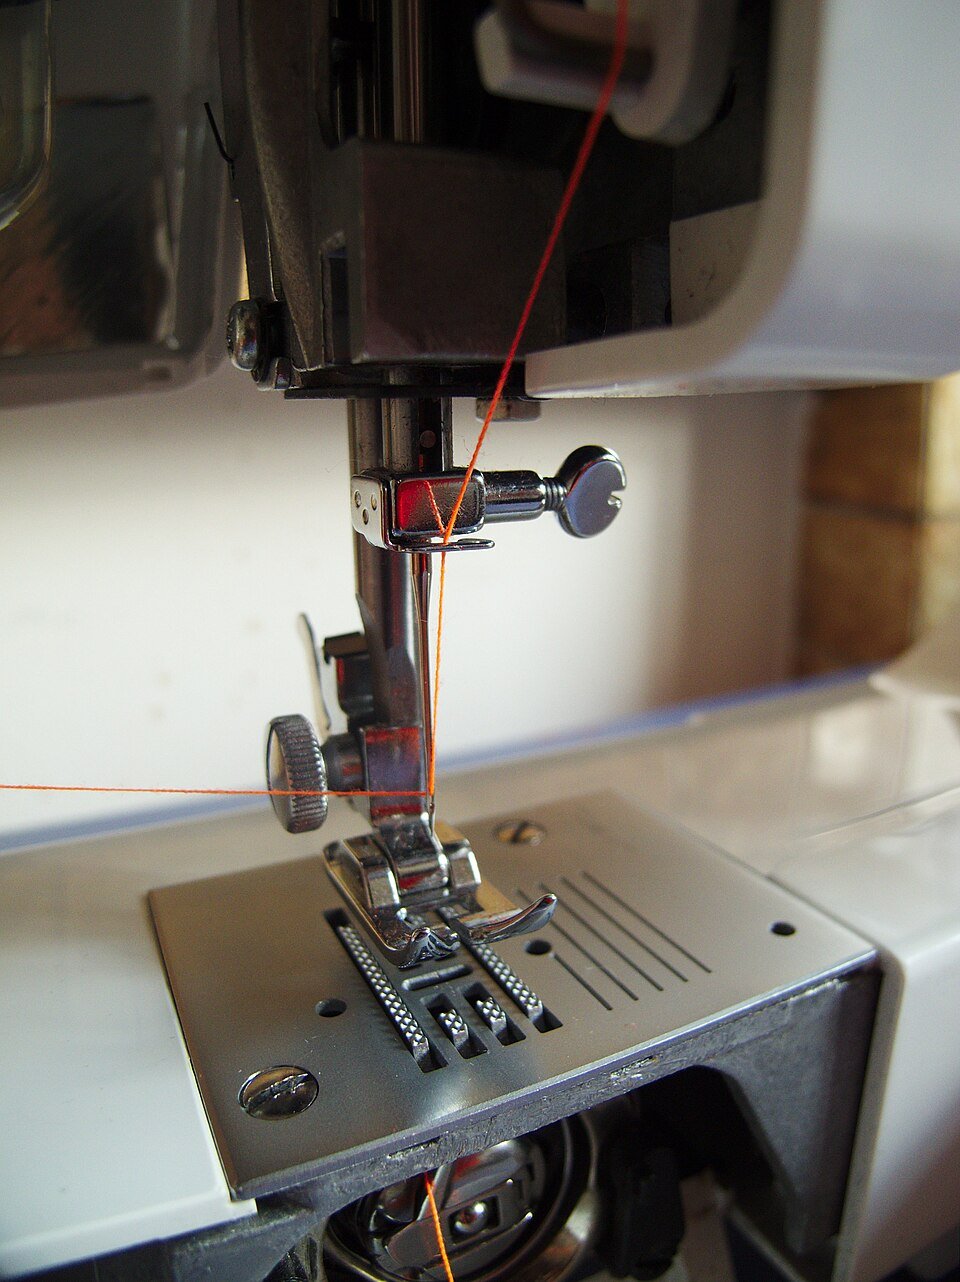
- Needle: carries the top thread through the fabric. Home machines use flat-shank needles that only fit one way, usually with the flat side to the back.
- Needle clamp screw: holds the needle in the needle bar. The needle must be pushed all the way up before you tighten it.
- Needle bar: the metal rod that moves the needle up and down.
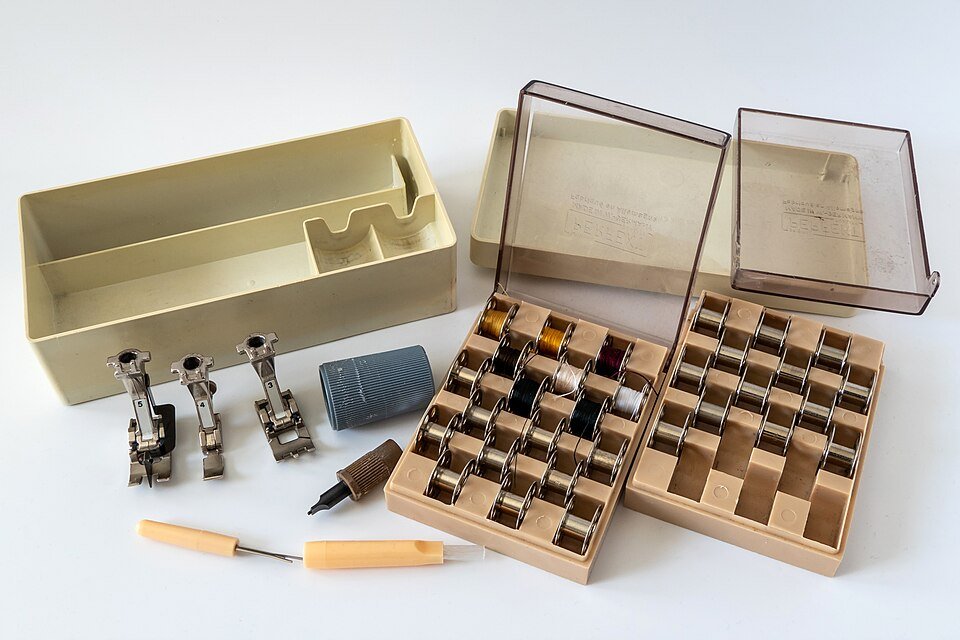
- Presser foot: holds the fabric flat against the feed dogs while you sew. Machines come with an all-purpose foot plus extra feet such as zipper and buttonhole feet.
- Presser foot lifter: the lever at the back of the head that raises and lowers the foot. The Janome DC2010 manual lists three positions: lowered, normal up, and a highest position about 0.6 cm higher for thick fabric.
- Needle plate (throat plate): the metal plate under the needle with a hole for the needle and lines that work as a seam guide.
- Feed dogs: small toothed bars that rise through the needle plate and move the fabric forward. Many machines have a drop feed lever to lower them for free-motion work or darning.

Which needle size for which fabric?
- Light fabrics (voile, georgette, lawn, crepe): needle size 9 or 11
- Medium fabrics (cotton, linen, poplin, double knits): needle size 11 or 14
- Heavy fabrics (denim, drapery, upholstery): needle size 14 or 16
3. Bobbin System (the Lower Thread)
- Bobbin: a small metal or plastic spool that holds the lower thread. Bobbins look alike but differ in height and width between machines, so use the type your manual lists.
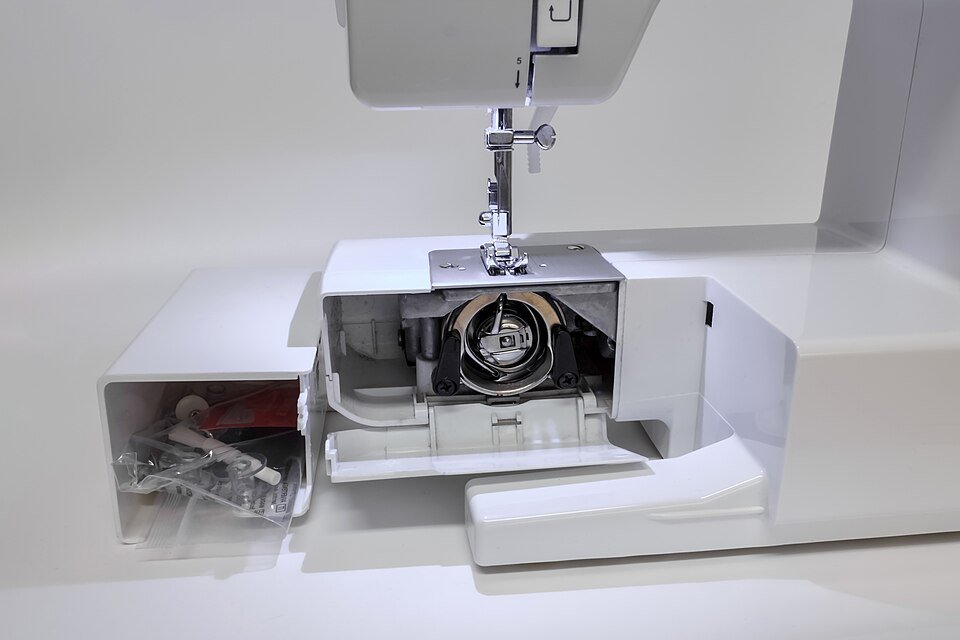
- Bobbin case: holds the bobbin and has a small spring that sets the bobbin thread tension. Front-loading machines use a removable case. Drop-in (top-load) machines have a fixed holder under a clear cover.
- Hook (shuttle): the part that spins or swings around the bobbin case and catches the top thread loop. Rotary hooks spin in a full circle; oscillating hooks swing back and forth.
- Hook cover or slide plate: the cover over the bobbin area. On drop-in machines it is a clear plastic plate with a release button.
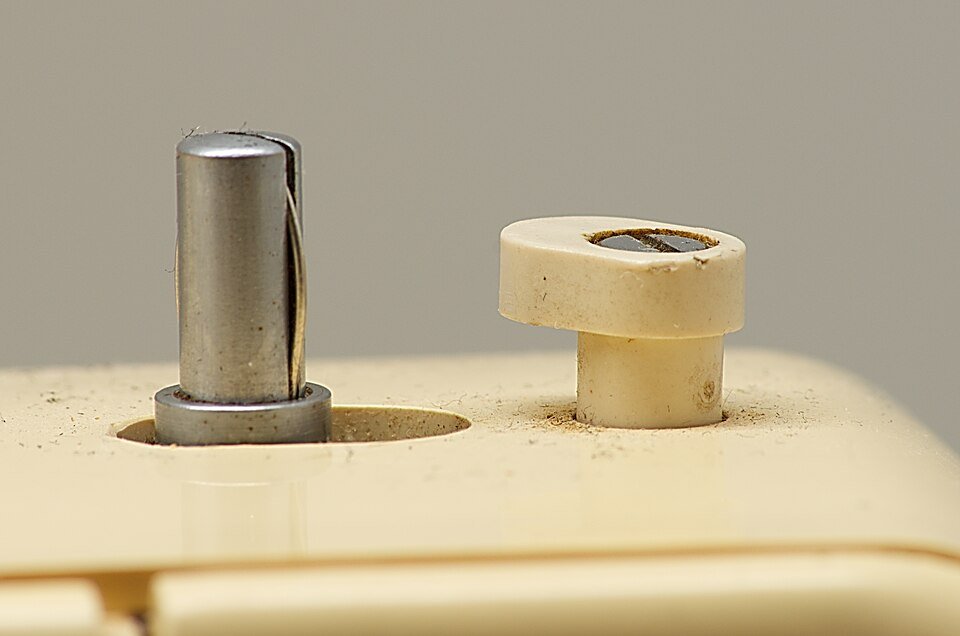
- Bobbin winder spindle and stopper: on top of the machine. You place an empty bobbin on the spindle, push it against the stopper, and the machine winds thread onto it.
4. Control Parts (Dials, Levers and Buttons)
- Handwheel: the wheel on the right side. Turning it moves the needle by hand. Always turn it toward you.
- Pattern selector dial: chooses the stitch, such as straight, zig-zag, blind hem or buttonhole. Computerised machines use buttons and a screen instead.
- Stitch length dial: sets how far the feed dogs move the fabric for each stitch. On the Singer 1409 it runs from 0 to 4 (mm).
- Stitch width dial: sets how wide a zig-zag stitch is. Not found on straight-stitch-only machines.
- Reverse lever or button: sews backwards while held, to lock the start and end of a seam.
- Power and light switch: turns on the motor circuit and the sewing light.
- Speed control: some newer machines have a slider that limits the top speed, which helps beginners.
5. Power and Body Parts
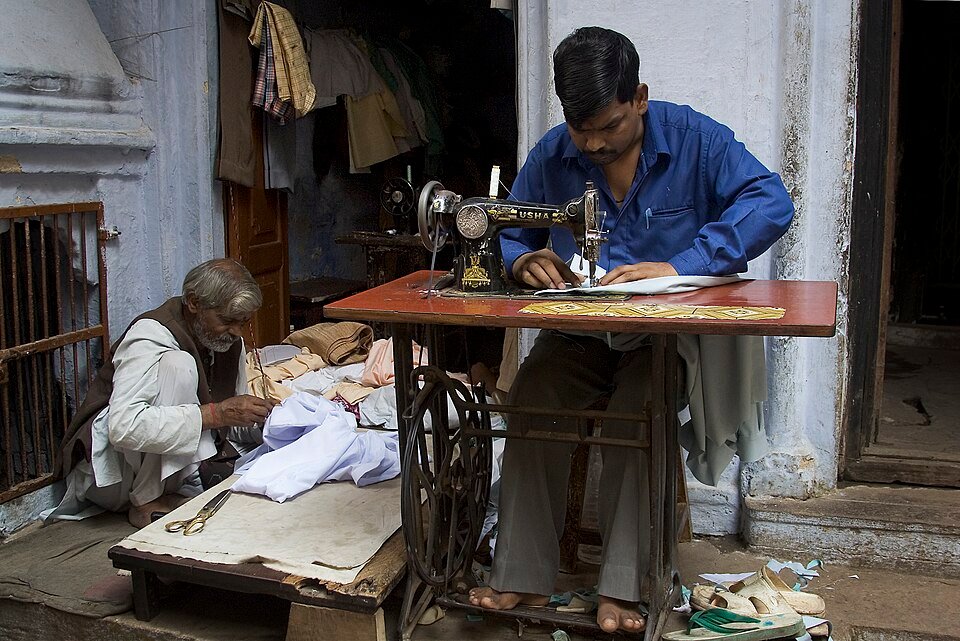
- Motor: drives the machine on electric models. Domestic add-on motors for hand machines are sold separately, for example the Usha 1/20 HP domestic motor.
- Belt: links the motor or treadle wheel to the handwheel. A loose belt slips; a tight belt makes the machine run hard and noisy.
- Foot pedal (foot controller): controls speed. Press harder to sew faster.
- Free arm and extension table: remove the extension table to sew sleeves, cuffs and trouser hems around the narrow free arm. The table often doubles as an accessory box.
- Face plate: the cover on the left end of the head. It hides the needle bar and take-up mechanism.
- Bed and body: the frame. Metal frames run steadier than plastic ones at high speed.
Parts of a Manual (Hand or Treadle) Sewing Machine
- Balance wheel: the large wheel on the right, the same job as the handwheel. It also keeps the machine running smoothly between pushes.
- Hand handle (crank): fitted to the balance wheel on hand machines so you can turn it by hand.
- Treadle: the foot plate in the stand. Rocking it turns a large wheel under the table.
- Pitman rod and band wheel: the rod links the treadle to the big wheel in the stand, and a leather belt carries the drive up to the balance wheel.
- Stitch regulator: a lever on the front that sets stitch length; on many models, moving it past zero sews in reverse.
- Slide plate: the sliding metal cover next to the needle plate that opens to reach the bobbin and shuttle.
Spare Parts That Wear Out First (and What They Cost)
- Needles: wear out fastest. Start each project with a new needle (University of Kentucky Extension advice). A SINGER 10-pack of 2020 universal needles listed at about Rs 1,099 to Rs 1,160 (imported pack).
- Bobbins and bobbin case: bobbins get lost or bent, and a case can get nicked by a broken needle. A combo of 10 metal bobbins and 1 bobbin case listed at Rs 199 (4.1 stars, 53 ratings); 2 bobbin cases with 4 bobbins at Rs 170 (4.1 stars, 104 ratings).
- Motor: an Usha 1/20 HP domestic sewing machine motor listed at Rs 1,650 (4.0 stars, 453 ratings).
- Presser feet: extra feet add jobs such as zippers and buttons. A SINGER kit of 9 presser feet with a twin needle listed at Rs 14,176 (imported). Check that any foot matches your machine's shank (low, high or slant).
- Belt: stretches or cracks over time. A slipping or squealing machine often just needs a new belt.
- Needle plate: gets burrs when the needle hits it. Burrs snag thread and fabric, so smooth or replace the plate.
How to Keep the Parts Working: Care Basics
- Clean out lint after each project, or at least after every 6 to 8 hours of sewing.
- Brush the bobbin area and feed dogs with a small brush. Use canned air to lift loose lint, but never blow into the machine.
- Clean the tension discs by sliding folded plain cloth between them with the presser foot raised.
- Oil only where your manual shows, with sewing machine oil only, never household oil. A drop under the bobbin housing is the usual point on machines that need oil.
- Change the needle at the start of each project and whenever it is bent or blunt.
- Switch off and unplug before cleaning or changing any part.
- Get a professional service (clean, oil and adjust) about every two years.
- Cover the machine when you are not using it.
Frequently Asked Questions About Sewing Machine Parts
The main parts are the spool pin, thread guides, tension dial, take-up lever, needle, presser foot, needle plate, feed dogs, bobbin, bobbin case, hook, handwheel, pattern selector, stitch length dial, reverse lever, motor and foot pedal. Manual machines add a balance wheel, hand crank or treadle, and a stitch regulator.
Feed dogs are the small toothed bars under the presser foot. They rise through the needle plate and push the fabric forward by one stitch length after each stitch. Lowering them lets you move the fabric freely for darning or free-motion work.
The take-up lever moves up and down with the needle. It pulls the top thread up after each stitch to tighten the stitch and feeds slack for the next one. Missing it while threading causes loops and thread nests under the fabric.
The bobbin is the small spool that holds the lower thread. The bobbin case is the holder the bobbin sits in; its small spring sets the bobbin thread tension. Drop-in machines have a fixed holder, front-loading machines a removable case.
Needles wear out fastest, so change them for each project. Bobbins, the bobbin case, presser feet and the drive belt come next. On older machines the needle plate can develop burrs that need smoothing or a new plate.
Clean out lint after each project or every 6 to 8 hours of sewing. Oil only the points your manual shows, with sewing machine oil. A professional clean, oil and adjustment about every two years keeps the parts in good order.
The handwheel on the right side moves the needle by hand, so you can lower it into the fabric, raise it, or make a single stitch. Turn it toward you. On manual machines the larger balance wheel also carries the drive from the hand crank or treadle.
No. Bobbins differ in size and material, and presser feet differ by shank type. Using the wrong ones causes loose stitches, jams and skipped stitches. Buy parts listed for your brand and model, or check your manual.
Key Takeaways
Hi, I’m Abirami. I have many years of hands-on experience in sewing and tailoring, from stitching everyday clothes and blouses to doing alterations at home. I write Riderly’s sewing machine reviews and guides, and I use that experience to judge which machines are easy to thread, stitch cleanly and suit Indian homes and beginners.