UPDATED OCTOBER 2026 | BEGINNER GUIDE | BOBBIN, UPPER THREAD AND TENSION
How to Thread a Sewing Machine: Step-by-Step Guide for Beginners
Threading a sewing machine means winding the bobbin, loading it, and guiding the top thread through every guide to the needle. This guide shows the full path in plain steps, how to set the tension, and how to fix the common problems that come from wrong threading.

Quick Answer: How Do You Thread a Sewing Machine?
To thread a sewing machine: switch it off, raise the needle and presser foot, guide the top thread from the spool through the thread guides, tension discs and take-up lever down to the needle, then wind and insert the bobbin and bring its thread up through the needle plate. Always sew a test seam on scrap fabric and adjust the tension dial if the stitches look loose or tight.
- Wind the bobbin first, then insert it with the thread unwinding counterclockwise
- Raise the needle and presser foot before you thread the top thread
- Follow the numbered threading diagram printed on your machine
- Leave a tail of about 6 inches (15 cm) and pull it to the back
- Test on scrap fabric and fine-tune the tension dial
What You Need Before You Start
- A spool of thread and a bobbin that matches your machine (metal or plastic as the manual says)
- A needle that suits your fabric (see our sewing machine needle sizes guide)
- Scrap fabric for the test seam
- Your machine manual or the threading diagram printed on the machine
- Good light, and the power switched off for every threading step
Every machine is a little different, so treat this as a map of the typical path. If your machine has numbered guides or arrows, follow those first. For help choosing a machine in the first place, read how to choose a sewing machine.
Step 1: Wind the Bobbin
The bobbin holds the lower thread. Manufacturer manuals such as the Penn State Maker Commons Singer quick start and the Janome instruction book describe the same basic sequence.
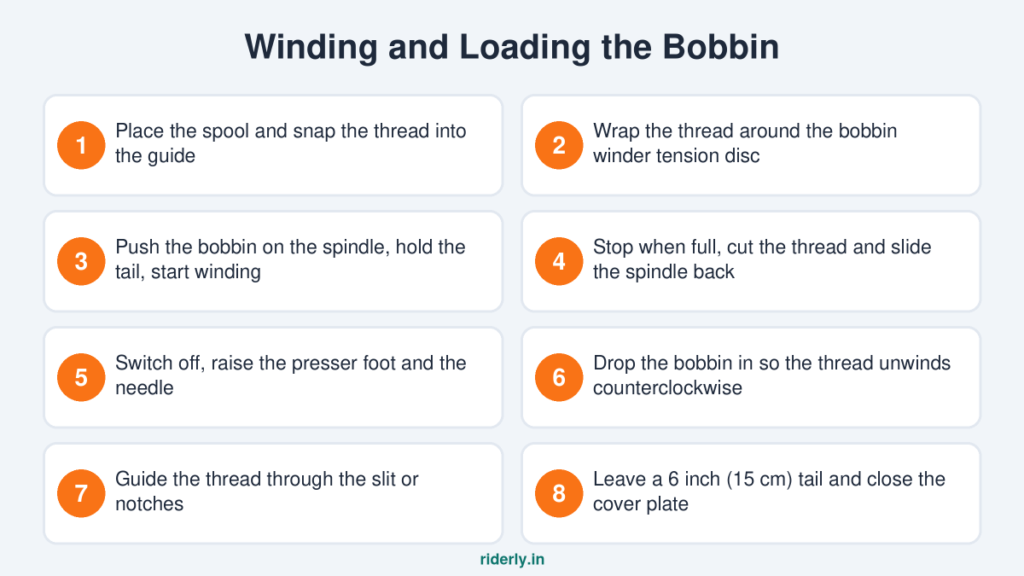
- Place the spool on the spool pin, with the matching spool holder, and snap the thread into the thread guide.
- Wrap the thread around the bobbin winder tension disc (clockwise on the Singer quick start).
- Pass the thread through the hole in the empty bobbin from the inside to the outside if your machine asks for it, and set the bobbin on the winder spindle.
- Slide the spindle to the right (winding position) and hold the loose thread end.
- Press the pedal or start the machine. After a few turns, stop and trim the tail close to the bobbin.
- Wind until full. Many machines stop on their own. Cut the thread, slide the spindle back to the left and remove the bobbin.
Move the spindle back to the sewing position. A machine will not sew while the bobbin winder is engaged.
Step 2: Insert the Bobbin
- Switch off the machine, raise the presser foot and raise the needle to its highest position.
- Open the bobbin cover plate (push the small tab on a top-load machine).
- Place the bobbin in the case so the thread unwinds counterclockwise, as the Singer and Janome manuals both state.
- Guide the thread through the slit or the notches shown by the diagram on the plate.
- Pull out a tail of about 6 inches (15 cm), then close the cover plate.
If the bobbin thread has no tension, check that you used the right bobbin type and that the thread sits in the notch. A plastic bobbin in a machine built for metal bobbins, or the other way round, is a common cause of loose stitches. Always use the bobbin type your manual lists.
Step 3: Thread the Top (Needle) Thread
Raise the needle to its highest point and raise the presser foot first. This opens the tension discs so the thread seats between them. Then follow the path below. The order is the same on most home machines.
- Spool and upper guide: place the spool on the pin and draw the thread through the upper thread guide.
- Tension discs: lead the thread down the channel, holding it between the spool and the guide so it seats between the discs.
- Take-up lever: go down and around, then pass the thread through the eye of the take-up lever at the top of its travel.
- Lower guides: bring the thread down through the lower thread guide and behind the needle bar guide.
- Needle: thread the needle from front to back on most machines, or use the built-in needle threader.
- Finish: pull 6 to 8 inches (15 to 20 cm) of thread under the presser foot to the back, then lower the presser foot.
Most Janome models list the same path: guide, check spring, tension dial, take-up lever eye, lower guide, needle bar guide and needle. If your needle threader hook does not catch the eye, lower the presser foot first as the Janome manual instructs.
Step 4: Bring Up the Bobbin Thread
- Hold the top thread loosely with your left hand.
- Turn the handwheel toward you (counterclockwise) to lower and raise the needle once. Never turn it away from you, because that can disturb the timing.
- Tug the top thread gently. A loop of the bobbin thread comes up through the needle plate hole.
- Pull both threads to the back under the presser foot, leaving 4 to 6 inches (10 to 15 cm).
- Lower the presser foot and sew a few stitches on scrap fabric.
Step 5: Check and Adjust the Thread Tension
Sew a test seam on a scrap of your fabric and check both sides. In a balanced stitch the two threads lock in the middle of the fabric layers. Janome guidance is to raise the needle tension number if stitches are loose or the top thread shows on the back, and to lower it if stitches are tight or the bobbin thread shows on the front. Janome lists typical dial settings of 2 to 6 for straight stitch and 3 to 7 for zig-zag, but your machine and fabric may differ.

Change only one thing at a time: first the top tension dial, and only then the bobbin tension if your manual allows it.
Common Threading Problems and Fixes
- Top thread keeps breaking: re-thread from the start with the presser foot up, check the needle is not bent, and use a needle size that suits the thread and fabric.
- Skipped stitches: change the needle, check it is inserted all the way up with the flat side facing the back, and confirm the type matches the fabric.
- Loops or birds nest under the fabric: the top thread was not seated in the tension discs. Raise the presser foot and thread again.
- Bobbin thread shows on top: the top tension is too tight or the bobbin is in wrong. Re-insert the bobbin with the correct unwinding direction.
- Thread bunches at the start: hold both thread tails for the first 2 or 3 stitches.
- Machine will not sew: check the bobbin winder spindle is back in the sewing position.
- Uneven stitches: clean lint out of the bobbin area and re-thread.
Threading Different Types of Machines
- Mechanical and electric home machines: use the path above. See types of sewing machines for the differences.
- Mini and hand-operated machines: many have a simpler path but the same ideas. Our guide to using a mini sewing machine covers them.
- Computerised machines: often have automatic needle threaders and a drop-in bobbin with a printed diagram.
- Overlock and industrial machines: have more threads and need the manufacturer manual. Do not guess the path.
Not sure which machine type you own or want? Read how to choose a sewing machine, or jump to our Top 10 Best Sewing Machine For Home In India.
Care Tips to Keep Threading Smooth
- Change the needle at the start of each project or when it is dull; Consumer Reports advises changing it after each project or fabric type
- Use good quality thread; weak thread frays and breaks
- Remove lint from the bobbin area regularly
- Always raise the presser foot before threading
- Sew a test seam each time you change fabric or thread
Sources and Further Reading
This guide is based on published manufacturer manuals and reference pages. Riderly has not tested every machine mentioned.
Frequently Asked Questions About Threading a Sewing Machine
Thread from the spool through the guides and tension discs, around the take-up lever and down to the needle, usually from front to back through the needle eye. Follow the numbered arrows printed on your machine.
On the top-load and front-load machines in the Singer and Janome manuals, the thread unwinds counterclockwise when the bobbin is in place. Check the diagram on your bobbin cover.
The most common causes are wrong top threading with the presser foot down, a bent or dull needle, tension that is too high, and poor quality thread. Re-thread with the foot up and change the needle.
Leave about 6 inches (15 cm) of both threads, then pull them to the back under the presser foot. Hold them for the first few stitches.
No. Wind and load a new bobbin only when it runs out or when you change thread colour. Re-thread the top thread whenever it breaks or you change spools.
Yes. Cut the thread end cleanly at an angle, moisten or stiffen it, and pass it through the needle eye by hand, front to back on most machines.
This usually means the top tension is too tight or the bobbin is not seated correctly. Lower the top tension number and re-insert the bobbin with the correct unwinding direction.
No. The general order is the same, but guide positions, bobbin type and needle threaders differ. Always check your manual or the printed diagram. A mini machine may differ from a full-size one.
Final Verdict
Threading becomes easy once you remember the order: wind the bobbin, insert it with the thread unwinding counterclockwise, raise the presser foot, guide the top thread all the way to the needle, bring the bobbin thread up and test on scrap fabric. If you are still choosing a machine, start with our Top 10 Best Sewing Machine For Home In India guide.

Hi, I’m Abirami. I have many years of hands-on experience in sewing and tailoring, from stitching everyday clothes and blouses to doing alterations at home. I write Riderly’s sewing machine reviews and guides, and I use that experience to judge which machines are easy to thread, stitch cleanly and suit Indian homes and beginners.